Trex decking installation guide for joist spacing, gapping and fastening
Quick answer before you install
A Trex deck succeeds or fails at the frame as much as at the surface boards. The working rule is straightforward: confirm the exact Trex product profile, build a level, code-approved structural frame, keep joists at the required on-center spacing, reduce spans for angled layouts, leave the required board gaps, and use Trex-recommended or approved fasteners. Trex boards are not structural lumber. They should not be fastened directly to a solid or watertight surface, and they need drainage and airflow beneath the deck. This editorial summary is based on Trex 2026 installation information, Trex care and warranty language, and Intertek code report information available as of August 29, 2026. Always check the current manufacturer instructions and your local building department before work starts.
For more practical building references, see our installation guides category.

Plan the project around code, product line and layout
Do not treat all Trex boards as interchangeable. Trex Signature, Transcend, Transcend Lineage, Select and Enhance boards may differ by profile, thickness, stair spacing, color range and approved fastening method. Before ordering material, identify whether the boards are grooved-edge or square-edge, whether they are 1×4, 1×6 or 2×6 profiles, and whether the surface will use a simple perpendicular layout, diagonal decking, a picture-frame border, breaker boards or a stair run.
Code matters because a deck is a structural assembly even when the walking surface is composite. Posts, beams, joists, ledgers, stair framing and related supports must be code-approved structural materials sized for the span and load. Intertek CCRR-0301 for Trex composite deck boards lists evaluation under ASTM D7032 and addresses the 2024, 2021 and 2018 IBC and IRC code families, but local amendments and permit requirements can still affect what an inspector requires. For hot tubs, heavy planters, roof decks, commercial projects or unusual spans, Trex guidance points users to a local building official, engineer or inspector rather than a generic span assumption.
- Confirm the exact board profile before calculating joist and stair stringer spacing.
- Check whether the project is residential, commercial, rooftop, dock, stair or sleeper construction.
- Use a layout drawing to locate butt joints, breaker boards, fascia, railing posts and stair transitions before cutting boards.
- Mix boards on site before fastening, especially with streaked colors, so lighter and darker tones are distributed intentionally.
- Store boards flat, supported and covered until installation to reduce jobsite handling problems.
Framing and joist spacing
For many U.S. residential Trex decking projects using common 1×6 boards, 16 in. on-center joist spacing is the key planning number. Trex also notes that decking must span at least three joists, and the joists must be level and plumb. If an existing wood deck has 24 in. on-center framing, do not assume it is ready for composite decking. In many replacement projects, the frame has to be modified or rebuilt before the new boards are installed.
Angled decking reduces allowable span because each board crosses the joists differently. Trex 2026 instructions state that a 60-degree pattern reduces the listed maximum joist span by 2 in., a 45-degree pattern reduces it by 4 in., and a 30-degree pattern reduces it to half of the listed distance. In the field, diagonal and patterned layouts usually mean tighter framing and more advance planning around borders and breaker boards.
| Installation condition | Planning rule |
|---|---|
| Typical flat residential deck surface | Use the Trex span chart for the exact profile; 16 in. on-center is the common planning value for many 1×6 installations. |
| Decking at 60 degrees to joists | Reduce the listed maximum span by 2 in. |
| Decking at 45 degrees to joists | Reduce the listed maximum span by 4 in. |
| Decking at 30 degrees to joists | Use one-half of the listed maximum span. |
| Rooftop or sleeper deck, residential | Trex lists 16 in. on-center for pressure-treated sleeper systems, with added reductions for angled layouts. |
| Rooftop or sleeper deck, commercial | Trex lists 12 in. on-center for pressure-treated sleeper systems, with local code review recommended. |
The frame also needs solid support at board ends. Trex states that the end of each board must rest on a framing member and be fastened at that point. Butt joints should be planned over the correct framing, and special patterns may need added blocking or double joists so clips, screws and board ends have proper bearing.
Gapping, overhang and temperature rules
Board gaps are not just appearance details. They provide drainage, allow slight thermal movement and help the wood joist system dry and shrink without trapping the deck boards. Trex gives separate gap requirements for width-to-width spacing, board ends, ends against solid objects, fascia and stairs. Hidden fasteners can set the side-to-side gap in the field, but installers still need to control butt joints, wall clearances, board ends and stair details.
| Location | Trex planning value |
|---|---|
| Width-to-width gap between deck boards | Minimum 3/16 in. in hot or cold weather. |
| Heavily wooded areas | Trex recommends increasing the width gap to 3/8 in. for added debris clearance and drainage. |
| Maximum board gap | No gap should exceed 1/2 in. |
| End-to-end or end-to-width gap above 40°F at installation | 1/8 in. |
| End-to-end or end-to-width gap below 40°F at installation | 3/16 in. |
| Board end abutting a wall or other solid object above 40°F | 1/4 in. |
| Board end abutting a wall or other solid object below 40°F | 1/2 in. |
| Maximum perpendicular overhang for Trex decking | 3/4 in. |
| Stair tread board gap | 1/4 in. to 3/8 in. |
Temperature should be measured at the time of installation, not guessed from the season. A cold morning installation and a hot afternoon installation can call for different end gaps. Also note that Trex 1×4 decking is not recommended for overhang applications except where 1×4 decking runs perpendicular to framing. That is one reason the product profile should be confirmed before the deck border is finalized.
Fasteners, board ends and clean cuts
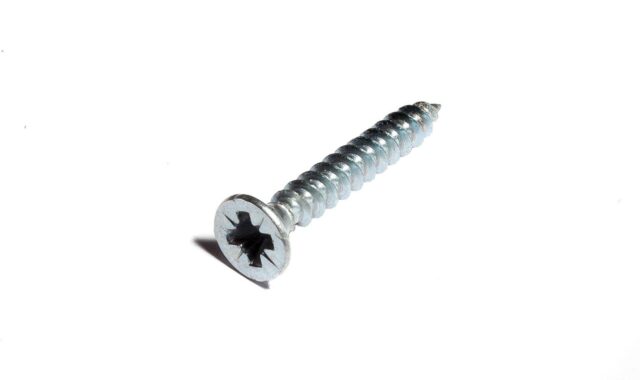
Fastener choice affects performance and warranty coverage. Trex lists branded recommended fasteners and other approved fasteners for decking and fascia. If a problem is attributable to non-recommended or non-approved fasteners, Trex warranty language can exclude that condition. The practical takeaway is to choose the fastening system only after matching it to the exact Trex board, framing type and application.
For face-fastened decking, Trex requires two screws per joist. Approved color-matching face screws should be driven flush with the board surface, not countersunk below the shell. Near saltwater, stainless steel screws are recommended. With metal framing, Trex states that installers should follow the metal framing manufacturer instructions, use two screws per joist when screws are used, and pay attention to fastener material compatibility. If a fastener is compatible with the metal substrate but is not listed as a recommended Trex fastener, the decking may need to be predrilled.
Hidden fasteners require the same discipline. Trex Hideaway-style hidden fasteners must be placed at every joist, including board ends. Square-edge boards can be routed where the approved hidden fastening method requires it, but routing should follow the manufacturer procedure. In areas prone to large 24-hour temperature swings, Trex notes an additional predrilled toenail screw detail at board ends and the center of the board when using universal hidden fasteners.
Cut quality matters because the gaps are small and visible. Trex requires clean, square board ends and a minimum clean cut of 3/16 in. on both ends. Do not leave factory ends, damaged ends or out-of-square cuts at visible butt joints and borders if the gap needs to be precise. A clean cut, a supported end, the correct gap and the correct fastener all work together.
Stairs, fascia and sleeper systems need separate details
Stairs
Stairs are not just narrow deck surfaces. Trex stair tread guidance lists a minimum 36 in. stairway width in common model-code terms, an 11 in. minimum tread depth and fastening across at least four stringers. The maximum stringer spacing depends on the Trex profile: Enhance 1×6 is listed at 9 in. on-center; Signature, Transcend, Transcend Lineage and Select 1×6, plus Transcend Lineage 1×4, are listed at 12 in. on-center; Transcend and Select 2×6 are listed at 16 in. on-center. Stair tread gaps should be 1/4 in. to 3/8 in., and tread overhang should not exceed 3/4 in. See also: BUILDING MATERIALS.
Fascia
Fascia must be gapped with the same expansion and contraction logic used for decking. Trex recommends installing fascia under decking edges and ends for better appearance and performance. When spacers are used, the 2026 guide describes exterior-grade spacers 3/16 in. to 1/4 in. thick, at least 1 in. wide, and spaced 9 in. on-center. For 2×8 framing, Trex describes two fascia fasteners; for 2×10 or larger framing, three fasteners are used, with placement near the top, center and bottom of the rim joist.
Do not confuse fascia fasteners with deck-board fasteners. Trex notes that fascia system screws are for composite fascia profiles and are not for standard-thickness decking boards used as fascia. If deck boards are used as fascia, Trex describes a different approach using recommended composite decking screws every 12 in., with weather-resistant construction adhesive as a secondary fastener.
Rooftop and sleeper decks
A sleeper system is a substructure between a solid surface and Trex decking. The critical requirements are drainage, access and airflow. Trex says water must be able to flow through and away from the deck, and the sleeper system should not be a floating assembly. It should be level, secured and arranged so any roof application drains in the direction of the roof pitch. For sleeper areas where small debris can accumulate, Trex allows a minimum 1-1/2 in. height; where debris buildup is more likely, Trex recommends 3-1/2 in. or greater height so debris can be removed.
Step-by-step installation sequence
- Confirm documents and permits. Start with the current Trex instructions for the exact product and check local code requirements, especially for elevated decks, stairs, roof decks and railings.
- Inspect or build the frame. Verify joist size, spacing, level, crown, blocking, ledger condition, beam support and drainage. Replace questionable framing before installing new boards.
- Plan the board layout. Locate picture-frame borders, breaker boards, butt joints, stair noses and fascia transitions so every board end lands on framing.
- Prepare materials. Store boards flat on proper supports, keep them covered until use, and mix boards for balanced color variation.
- Install starter clips or first-board fasteners. Keep the first board straight because every following board will reference it.
- Fasten field boards. Use approved hidden fasteners at every joist or two approved face screws per joist, depending on the system.
- Control gaps at every transition. Recheck width gaps, butt gaps, wall gaps and stair tread gaps as the work progresses.
- Finish fascia and stairs separately. Follow the profile-specific stair stringer spacing and fascia fastener method instead of treating them like ordinary deck boards.
- Clean the deck after installation. Remove construction dust and debris with a hose, warm soapy water and a soft bristle brush where appropriate.
Common mistakes and inspection checklist
Many Trex installation problems come from treating composite boards like thicker wood decking. Composite decking has manufacturer-specific span, gap and fastener requirements. A deck that looked acceptable with old wood boards may need additional joists, blocking or a rebuilt frame before Trex boards can be installed correctly.
- Do not install Trex directly over a solid surface or watertight system without an approved sleeper design that drains and ventilates.
- Do not skip end gaps because the boards look tight and clean on installation day.
- Do not countersink face screws below the deck surface.
- Do not leave board ends unsupported or floating past the allowed overhang.
- Do not use fascia screws on standard deck boards used as fascia.
- Do not assume stair stringer spacing is the same as deck joist spacing.
- Do not combine boards of different thicknesses, such as Trex Select with thicker Trex lines, unless the manufacturer specifically allows the detail.
- Do not ignore heat exposure. Darker composite colors can feel hotter in direct sun, and reflected sunlight from low-E glass can intensify surface heat.
A final inspection should verify framing spacing, board support, gap sizes, fastener placement, screw depth, fascia clearance, stair stringer spacing and drainage. If any item is uncertain, stop and confirm it before the next row of boards locks the condition in place.
Frequently asked questions
What joist spacing should I use for Trex decking?
For many standard residential deck surfaces using common 1×6 Trex boards, 16 in. on-center is the practical planning number. The exact allowable spacing still depends on the product profile, load rating and layout. Diagonal patterns reduce the allowable span, and stairs use separate stringer spacing rules.
How much gap should Trex deck boards have?
Trex lists a 3/16 in. minimum width-to-width gap in both hot and cold weather. End-to-end gaps are 1/8 in. above 40°F at installation and 3/16 in. below 40°F. When a board end abuts a wall or solid object, the gap is 1/4 in. above 40°F and 1/2 in. below 40°F.
Can Trex be installed over existing deck boards or concrete?
Trex should not be attached directly to a solid surface or watertight system. If building over a roof or solid surface, use an appropriate sleeper system with drainage, access and airflow. If replacing old wood decking, remove the old boards and inspect the frame before installing composite decking.
Do I have to use hidden fasteners?
No. Trex decking can be installed with approved hidden fasteners or approved composite deck screws, depending on the board and detail. Hidden fasteners are common with grooved boards and can create consistent side gaps, but face-fastening remains an option when the correct screws and spacing are used.
Is Trex decking a DIY project?
It can be a DIY project for experienced builders on simple, low-risk deck surfaces. Elevated decks, stairs, rooftop decks, commercial loads, hot tubs and complex railing layouts should be reviewed by a qualified professional or local building official before installation.