How to install grommets in fabric, desks and home projects

Quick answer
To install grommets cleanly, start by identifying the grommet type: a two-piece metal grommet for fabric, a snap-in or press-fit cable grommet for a desk, or a rubber grommet for protecting wires through a panel. The basic sequence is similar in each case: mark the location, reinforce or support the material, cut a clean hole to the size specified by the grommet kit, insert the grommet body, attach the washer or cover, and set or seat it with the correct tool.
Most installation problems come from a few avoidable errors: cutting the hole too large, using the wrong setter size, placing the washer upside down, or drilling a desktop without checking what is underneath. This guide focuses on practical home, furniture and building-material projects. For more related walkthroughs, browse our installation guides.
Choose the right grommet before cutting
A grommet is a protective ring or eyelet fitted into a hole. It can reinforce fabric, protect a cable from a sharp edge, or create a finished pass-through in a desk or cabinet. Because each material behaves differently, do not begin with the drill bit or punch. Begin with the grommet type and the cut-out size required by that product.
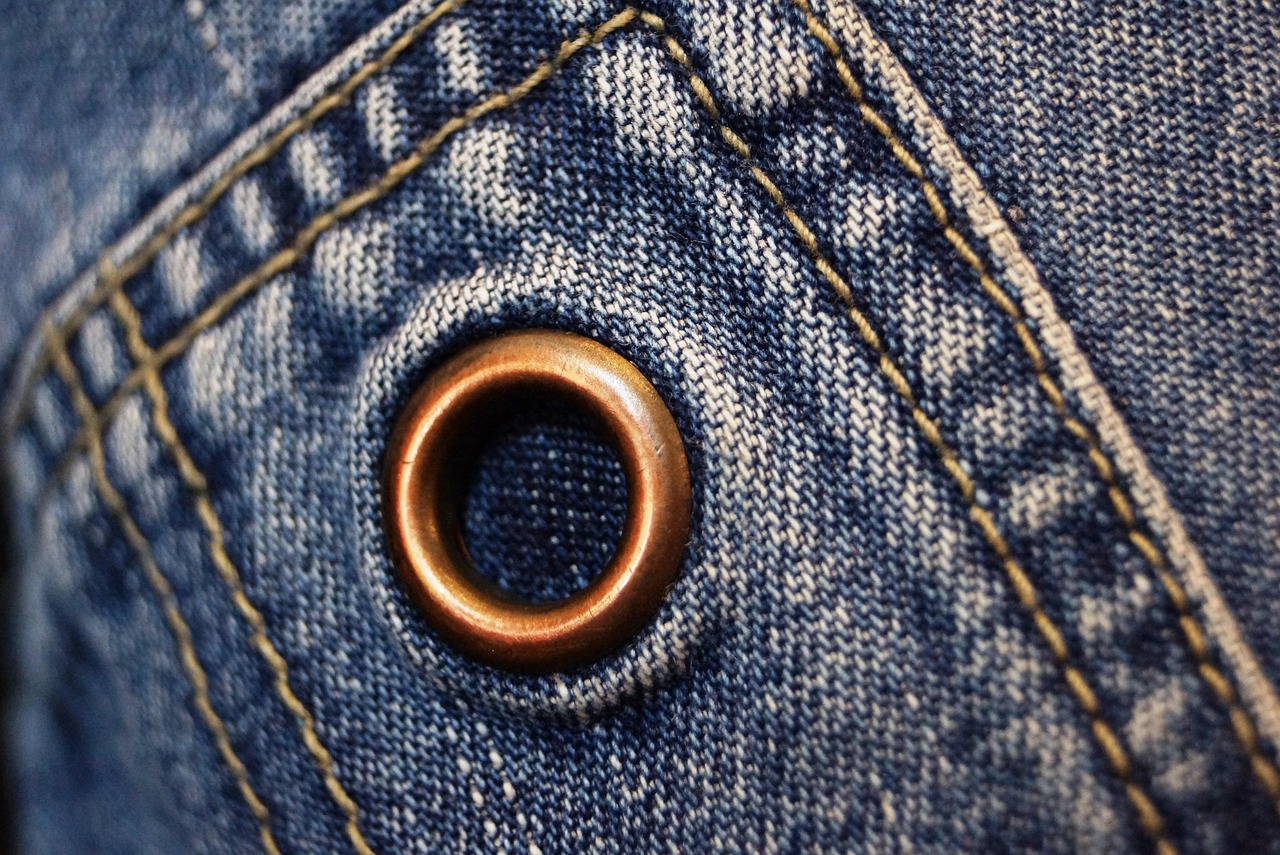
- Metal fabric grommets: Common on curtains, tarps, canvas covers, upholstery panels, storage bags and fabric organizers. They usually include a barrel-shaped front piece and a washer on the back.
- Plastic snap grommets: Often used in lightweight curtains or decorative fabric panels. Many snap together by hand or with light pressure, but they still need an accurately cut opening.
- Desk cable grommets: Used in desktops, shelves, office cabinets and media furniture to route cables through a finished hole. They are often plastic, metal or a combination with a removable cap.
- Rubber grommets: Used where wires, tubes or hoses pass through thin metal, plastic or wood panels. Their main purpose is edge protection.
- Power grommets: These include outlets, USB charging or data modules. Treat them differently from simple cable pass-throughs because electrical safety and product listing matter.
Manufacturer instructions from common grommet and drapery hardware brands follow the same principle: the hole, grommet body, washer and setting tool must match. A grommet marked as one size does not mean every cap, flange or visible outer edge uses that same measurement. Always check the required cut-out size supplied with the specific kit.
Tools and materials you may need
You do not need every tool listed below. Select tools based on the project material and the grommet style.
| Project type | Typical tools | Important note |
|---|---|---|
| Fabric, canvas or vinyl | Marking pencil, ruler, cutting mat, hole cutter or punch, anvil, setter, mallet, grommet press or pliers | Use the cutter and setter that match the grommet size, not a similar-looking tool. |
| Curtains with plastic snap grommets | Template, fabric marker, sharp scissors or cutter, flat work surface | Cut to the template supplied with the grommet set. |
| Wood, MDF or laminate desktop | Tape measure, square, painter’s tape, drill, pilot bit, hole saw or Forstner bit, scrap backing board, sandpaper | Confirm the grommet’s required cut-out diameter before drilling. |
| Metal or plastic panel | Step bit or hole saw, deburring tool, file, rubber grommet | Remove sharp burrs before pressing in the grommet. |
| Power grommet | Manufacturer template, drill or saw, cable clips, listed power unit | Follow the supplied instructions and local electrical requirements. |
For fabric work, a proper anvil-and-setter kit produces a cleaner roll than improvised hardware. For furniture panels, a sharp hole saw reduces chipping and heat marks. On laminate, veneer, bamboo and finished wood, painter’s tape and a backing board help limit tear-out around the exit side of the hole.
How to install grommets in fabric
Fabric grommets need enough strength around the opening. If the cloth is thin, stretchy or loosely woven, reinforce it first with a hem, facing, interfacing, webbing or an extra patch. Heavy canvas and vinyl may need a stronger grommet and a press-style tool rather than a small craft setter.
Mark the layout
Lay the fabric flat and mark the center of each grommet. Use a ruler or spacing gauge so the finished row looks deliberate and even. For curtains, mark from a consistent folded top edge. For covers, bags and furniture fabric panels, keep the grommet far enough from the edge that the fabric will not tear under load. If the project will carry tension, test one grommet on a scrap piece before cutting the actual panel.
Cut the hole
Use the cutting die, punch or template supplied with the kit. The hole should fit the grommet barrel, not the outer decorative rim. If the hole is too small, the fabric may bunch and prevent a clean set. If it is too large, the grommet may spin, pull out or leave raw fabric exposed.
Cut on a stable surface. A hollow punch on a cutting block usually gives a cleaner result than scissors on thick material. For delicate fabric, sharp small scissors can work if the template is accurate and the cut edge stays smooth. Do not tear the hole open by hand; stretched fibers reduce the grip of the grommet.
Insert and set the grommet
- Place the front grommet piece through the right side of the fabric so the barrel projects to the back.
- Place the washer over the barrel on the wrong side of the fabric, following the washer direction shown in the kit instructions.
- Set the grommet on the matching anvil or bottom die.
- Hold the setter straight at a 90-degree angle.
- Strike with controlled, even blows or press with the tool until the barrel rolls securely over the washer.
- Inspect both sides. The washer should be captured evenly, with no sharp split edges or loose movement.
Stop once the metal has rolled into position. Excess force can split the barrel, distort the face or crush the fabric. If the grommet is crooked, loose or sharp, remove it and install a new one rather than trying to flatten it into place.
How to install a desk cable grommet
A desk grommet is a furniture fitting, so the finished look depends heavily on the hole. Unlike fabric, a desktop cannot be patched invisibly after a wrong cut. Measure carefully, then confirm the underside before drilling.
Plan the location
Choose a spot where cables can drop naturally without hitting drawer boxes, metal support rails, modesty panels, frame crossbars or wall brackets. On a desk, the rear left or rear right area is common, but the best location depends on the monitor, lamp, charger, keyboard, cable tray and wall outlet position. Leave enough edge distance so the tabletop remains strong and the grommet flange sits fully on the surface.
If the desktop is already installed, check the underside with a flashlight. On adjustable desks, make sure the hole will not interfere with the lifting frame. On cabinets, verify that the cable path will not block drawers or shelves.
Confirm the cut-out size
Desk grommets are often described by nominal sizes such as 60 mm, 80 mm, 2 inches or 3 inches, but the exact required cut-out can vary by product. The visible cap is larger than the hole because the flange must cover the raw edge. Use the cut-out dimension from the packaging or template, not the outside diameter of the top cover.
Drill the opening
- Mark the center point and cover the area with painter’s tape to reduce surface chipping.
- Clamp a scrap backing board under the desktop if you can reach the underside.
- Drill a small pilot hole straight through the center mark.
- Use a hole saw or Forstner bit that matches the required cut-out diameter.
- For finished wood or laminate, drill from the top until the pilot bit passes through and the saw begins the cut, then finish from the underside if access allows. This reduces blowout on the exit side.
- Clear sawdust often. Heat buildup can scorch wood, dull the cutter or mark laminate.
- Lightly sand the inside edge and remove dust before fitting the grommet.
Raw MDF and particleboard edges can absorb moisture and shed fibers. If the grommet will be used in a kitchen cart, workbench or humid room, seal the exposed edge with a suitable finish before final installation, allowing it to dry according to the product instructions. See also: BUILDING MATERIALS.
Fit the grommet and route cables
Most simple desk grommets press into the hole from the top. Some use spring tabs, screws, threaded collars or friction ribs. Push evenly so the flange sits flat. If the grommet is too tight, do not hammer the visible cap directly; remove it and lightly sand the hole instead. If it is loose, check whether the wrong hole saw was used or whether the product requires a retaining ring underneath.
Route cables with gentle bends. Use cable clips or ties under the desk so plugs are not pulling on the grommet cover. The U.S. Consumer Product Safety Commission’s electrical safety materials warn against cords being pinched by furniture or overloaded beyond their rated capacity. A cable grommet should organize cords, not hide unsafe cord routing.
How to install rubber grommets in panels
Rubber grommets protect wires and hoses from the edge of a hole. They are common in appliance panels, workshop cabinets, metal boxes and DIY furniture with lighting or low-voltage wiring.
- Measure the cable or tube that must pass through the center opening.
- Choose a grommet with an inside diameter large enough for the cable and a groove width that matches the panel thickness.
- Cut or drill the panel hole to the grommet manufacturer’s listed hole size.
- Deburr the edge completely. Sharp metal can cut the grommet during installation.
- Compress one side of the rubber grommet and work the groove into the hole around the full circle.
- Pull the cable through without forcing an oversized connector through the rubber opening.
If the wire carries household voltage, follow the equipment manufacturer’s instructions and applicable electrical rules. A rubber grommet protects against abrasion, but it does not replace strain relief, conduit, junction boxes or certified fittings where those are required.
Power grommets and safety limits
A simple cable grommet is a hole liner. A power grommet is an electrical product, and that distinction matters. Power and charging modules used in furniture should be listed or certified for their intended use, installed according to the supplied instructions and connected only in the manner allowed by the manufacturer.
Safety information from UL Solutions describes furniture power distribution units and pop-up receptacle assemblies as products evaluated for specific furniture and countertop applications. In practical terms, do not treat a power grommet like a decorative desk accessory. If the installation involves fixed wiring, a kitchen or bathroom counter, a commercial workspace, or any modification to building wiring, consult a qualified electrician and local code requirements.
For ordinary home desks, keep these limits in mind:
- Do not pinch cords between the desk and wall.
- Do not run power cords where chair wheels or drawers will damage them.
- Do not overload a power strip or grommet module beyond its rating.
- Do not cover power connections with rugs, fabric panels or stored papers.
- Do not cut off plugs, modify molded cords or hardwire a plug-in unit unless the product is specifically designed for that installation.
Common mistakes and how to avoid them
| Mistake | What happens | Better approach |
|---|---|---|
| Cutting the hole to the visible cap size | The opening becomes too large and the grommet will not grip. | Use the barrel size, template or listed cut-out dimension. |
| Skipping reinforcement on thin fabric | The fabric tears around the grommet under tension. | Add interfacing, a folded hem, webbing or a patch before cutting. |
| Using the wrong setter | The metal splits, folds unevenly or leaves sharp edges. | Use the die set made for that grommet size and style. |
| Hammering at an angle | The washer sets crooked and the grommet loosens. | Keep the setter vertical and strike evenly. |
| Drilling a desk without checking underneath | The hole hits a bracket, frame rail or drawer path. | Inspect the underside and map the cable route first. |
| Using a dull hole saw | The edge burns, chips or tears out. | Use a sharp cutter, clear dust and support the exit side. |
| Hiding unsafe power cords | Cords may overheat, pinch or become damaged out of sight. | Keep cords visible enough for inspection and follow product ratings. |
Frequently asked questions
Can you install grommets without a special tool?
Some plastic snap grommets can be installed without a metal setter, but most metal fabric grommets need the correct anvil, die, pliers or press. Improvised tools often leave sharp, loose or uneven edges.
Should the hole be smaller than the grommet?
For fabric grommets, the hole should match the barrel or the kit template, not the outer rim. It is often slightly smaller than the finished visible grommet, but it should not be so small that the fabric bunches. For desk grommets, use the exact cut-out diameter specified by the product.
What is the best way to keep fabric from tearing?
Reinforce the grommet area before cutting, use a clean punch or cutter, leave enough material around the edge and choose a grommet strong enough for the expected load. A decorative curtain needs less strength than a tarp, tie-down cover or heavy canvas panel.
Can I install a desk grommet after the desk is assembled?
Yes, if you can safely drill the location and support the underside. Remove drawers if needed, check for frame parts, clamp a backing board where possible and keep dust away from electronics. If the desk has a metal frame directly under the desired location, choose another spot.
Are grommets waterproof?
Most standard grommets are not waterproof by themselves. They reinforce or protect a hole, but water can still pass through the opening or around the edge. Outdoor covers, marine canvas and wet-area furniture may require compatible materials, sealants or purpose-made fittings.
Final checks before you set or drill
Before installing the final grommet, confirm four things: the grommet type suits the material, the hole size comes from the actual product instructions, the material is reinforced or supported, and the cable or fabric load will not pull against a weak edge. For fabric, test on scrap. For furniture, inspect both sides before drilling. For electrical modules, use listed products and follow the manufacturer’s instructions. Careful layout takes longer than the cut itself, but it is what separates a clean grommet installation from a permanent mistake.