Manual installation guide for furniture and building materials
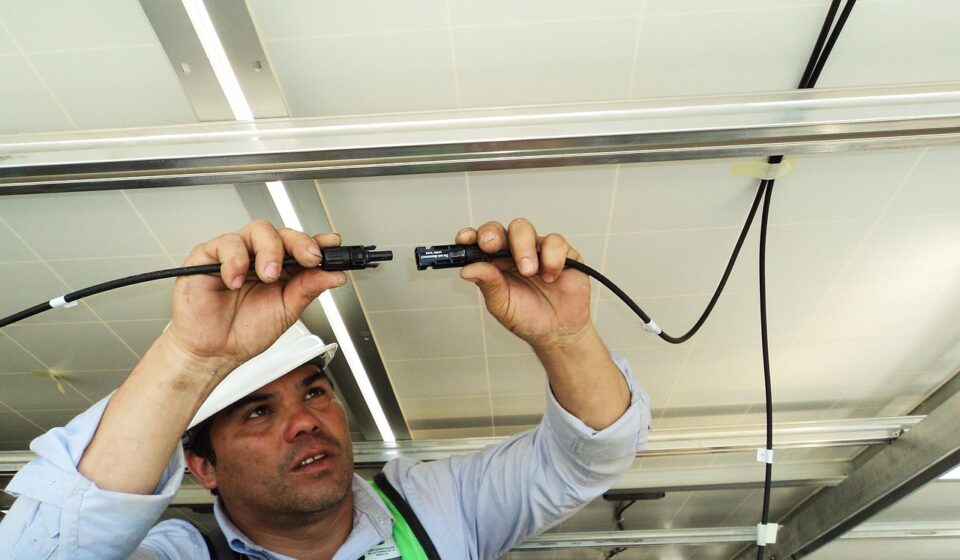
What manual installation means in furniture and building materials
Manual installation is the process of fitting, fastening, aligning, and finishing furniture or building materials through hand-guided work rather than fully automated equipment. It may include assembling cabinets, mounting shelves, laying trim, installing wall panels, fitting flooring accessories, or setting hardware. The aim is not simply to work by hand. A good installation follows the manufacturer’s instructions, uses accurate measurements, protects the material, and confirms that the finished work is safe, level, secure, and suitable for everyday use.
For homeowners, contractors, and facility managers, manual installation still matters because many interior products depend on actual site conditions. Walls may not be plumb, floors may slope, fasteners may need to match the substrate, and furniture components may need small adjustments during fitting. A careful manual process helps reduce gaps, misalignment, loose fittings, finish damage, and premature failure.

This guide focuses on practical installation judgment rather than one product category. For related topics, see the site’s installation guides.
When manual installation is the right approach
Manual installation is usually suitable when the work depends on precision, adjustment, or finish protection. It is common in residential furniture assembly, built-in storage, doors and hardware, decorative panels, baseboards, moldings, wall-mounted accessories, and many small renovation tasks. Even when power tools are used, the work is still largely manual if the installer must measure, align, hold, level, fasten, and inspect each component by hand.
It may not be the right approach when the job involves heavy structural components, electrical connections, gas lines, complex plumbing, load-bearing changes, or code-sensitive building work. Manual work can still be part of those projects, but the overall job may require licensed trades, permits, engineering review, or inspection. The key question is not whether someone can physically perform the task, but whether it can be completed safely and legally with the information and tools available.
| Installation situation | Manual approach can work when | Extra caution is needed when |
|---|---|---|
| Flat-pack furniture assembly | The manufacturer provides complete hardware and clear instructions | Panels are cracked, fasteners are missing, or the item must be anchored to a weak wall |
| Cabinet or shelf mounting | Studs or suitable anchors can be located and the load is modest | The unit is heavy, high-mounted, or intended to carry significant weight |
| Trim and molding | Measurements, cuts, and joints can be tested before fastening | Walls are uneven or the material is brittle, prefinished, or expensive |
| Decorative wall panels | The substrate is dry, clean, flat, and compatible with the fastening method | There is moisture, hidden wiring, or uncertain wall construction |
| Door and drawer hardware | Existing holes align or can be accurately marked | Drilling errors would damage a visible surface or weaken the component |
Plan the job before opening the toolbox
Good manual installation usually starts before any fastener is tightened. Read the manufacturer’s installation manual from beginning to end. Many errors happen when installers follow the first illustrated step and only later realize that a part should have faced the other way, a bracket should have been installed earlier, or two people were recommended for lifting.
Inspect both the work area and the materials. Check whether the wall, floor, cabinet surface, or other substrate is flat, dry, clean, and strong enough for the installation. For furniture and mounted accessories, identify whether the product is free-standing, wall-mounted, or anti-tip anchored. For building materials, confirm that the substrate matches the intended fixing method, whether adhesive, nails, screws, clips, or brackets.
Confirm dimensions and clearances
Measure the product, the opening, and the surrounding clearance. A cabinet may fit the width of a niche but still interfere with a door swing. A shelf may clear a window but block a switch plate. A panel may line up with one corner but expose an uneven ceiling line. Manual installation rewards installers who verify site dimensions instead of relying only on package dimensions.
Sort hardware and identify missing parts
Lay out screws, washers, cams, dowels, brackets, clips, shims, and caps before assembly. Compare them with the parts list. This simple step prevents one of the most common installation failures: using a similar-looking fastener in the wrong location. A screw that is too long can break through a finished surface, while one that is too short may not hold the load.
Decide what should not be improvised
Improvisation has limits. Substituting a fastener, changing anchor spacing, trimming a load-bearing component, or omitting an anti-tip restraint can affect safety and durability. If instructions are unclear, pause and verify the requirement rather than creating a hidden weakness that appears only after the product is loaded or used.
Tools and materials that support accurate manual installation
Manual installation does not require an oversized tool collection, but it does require the right basic tools in good condition. The exact list depends on the product, yet most furniture and building-material installations benefit from a measuring tape, pencil, level, square, utility knife, screwdrivers, hex keys, clamps, protective pads, stud finder, drill or driver, bits, shims, and suitable personal protective equipment.
Hand tools are often safer for final tightening because they provide better feedback. A hand screwdriver can help prevent over-tightening into particleboard, MDF, softwood, plastic inserts, or prefinished hardware. Power drivers are useful for speed, but they should be used with controlled torque, especially during the final turns.
- Measuring tools: A tape, level, and square help establish straight lines and correct spacing before holes are made.
- Marking tools: A sharp pencil, masking tape, or removable marker can make reference lines visible without staining the finish.
- Holding tools: Clamps, wedges, and a second pair of hands can prevent movement while parts are aligned.
- Fastening tools: Screwdrivers, hex keys, drivers, and appropriate bits should match the fastener head to prevent stripping.
- Protection supplies: Drop cloths, cardboard, felt pads, and painter’s tape help protect flooring, edges, and finished surfaces.
- Safety equipment: Eye protection, gloves, dust control, and hearing protection should be selected according to the cutting, drilling, or fastening task.
Tool condition also affects finish quality. A dull blade can tear laminate. A worn driver bit can damage screw heads. A poorly calibrated level can lead to crooked mounting. Because manual installation depends on feel and visual control, small tool defects can become visible installation defects.
A practical manual installation sequence
Although every product has its own instructions, most manual installation work follows a similar sequence: inspect, measure, dry fit, mark, pre-drill or prepare, fasten lightly, align, tighten, and inspect. Problems often begin when the middle steps are skipped.
Inspect and dry fit first
Before applying adhesive or driving screws, place the components in position without permanently fastening them. Dry fitting helps reveal uneven floors, bowed walls, tight openings, and incorrect part orientation. For multi-part furniture, it also confirms whether left and right components have been correctly identified.
Mark reference lines clearly
Reference lines are the installer’s map. Mark centerlines, stud positions, bracket heights, hole locations, and edge boundaries. On finished surfaces, use removable tape as a marking surface where appropriate. Recheck measurements from more than one reference point, especially when walls or floors are not square.
Prepare holes and surfaces
Pre-drilling can reduce splitting in wood and help screws follow the intended path. For panels and hardware, pilot holes also reduce the chance of wandering bits. If adhesive is used, the surface should be clean and compatible with the adhesive manufacturer’s instructions. Dust, moisture, paint failure, or loose substrate can reduce bond performance.
Fasten gradually and check alignment
Do not fully tighten the first screw before the whole assembly is aligned. Start fasteners lightly, check level and square, adjust as needed, then tighten in stages. This is especially important for cabinets, shelves, panel systems, and furniture frames, where early tension can pull the assembly out of shape. See also: BUILDING MATERIALS.
Finish with an inspection
After installation, test doors, drawers, hinges, slides, adjustable feet, locks, panels, and brackets. Look for gaps, wobble, rubbing, exposed fasteners, sharp edges, or stress marks. Load-bearing items should be checked against the manufacturer’s stated limits rather than personal judgment alone.
Common manual installation mistakes and how to avoid them
Many installation problems are not caused by lack of effort. They are caused by small decisions made too quickly. The following mistakes are common across furniture assembly and building-material installation.
- Ignoring the manual: Product-specific instructions may include required spacing, orientation, fastener type, load limits, curing time, or anchoring steps.
- Using the wrong fastener: Fasteners must match both the product and the substrate. Drywall, masonry, wood framing, metal studs, and composite panels may require different approaches.
- Measuring once: A single measurement can be affected by an uneven wall, a shifted part, or a misread mark. Confirm before cutting or drilling.
- Over-tightening: Excess force can strip threads, crush soft materials, distort frames, or crack prefinished surfaces.
- Skipping anchors or restraints: Tall furniture, wall cabinets, and raised storage often depend on correct anchoring to reduce tipping or detachment risk.
- Working alone when two people are needed: Large panels, long trim, wall units, and heavy cabinets are easier to align and safer to handle with assistance.
- Rushing finish details: Caps, caulk lines, edge trims, felt pads, and final adjustments often determine whether the work looks professional.
A useful habit is to pause before every irreversible action. Cutting, drilling, applying adhesive, and tightening concealed fasteners are points where correction becomes harder. A brief check at each stage can save hours of repair.
Safety, durability, and code considerations
Manual installation should be treated as practical construction work, even when the item looks simple. The installer is dealing with tools, loads, surfaces, and sometimes hidden building systems. Authoritative safety guidance from organizations such as OSHA emphasizes using tools properly, maintaining them in safe condition, and controlling hazards during work. Manufacturer instructions and local building requirements should guide any product-specific or code-sensitive decision.
For wall-mounted furniture and fixtures, the most important safety question is whether the supporting surface can carry the expected load. A fastener that works in solid framing may not perform the same way in hollow drywall, old plaster, masonry, tile backer, or metal framing. When the substrate is uncertain, the installation should be treated as uncertain until it is verified.
Durability also depends on the environment. Wood-based furniture can react to moisture. Adhesives may require specific temperature and curing conditions. Metal hardware can loosen if repeatedly stressed. Flooring transitions and trim can move slightly as materials expand and contract. A sound manual installation allows for these realities instead of forcing parts into place.
There are also clear boundaries. Electrical work, structural modifications, fire-rated assemblies, stair components, guardrails, plumbing penetrations, and exterior weatherproofing may involve code requirements that go beyond a general installation guide. In those cases, follow the product documentation and consult qualified professionals or local authorities where required.
Quality checks before the project is complete
The final inspection should be more than a quick visual check. A finished manual installation should meet four tests: position, stability, function, and finish. Position means the item is level, plumb, square, centered, or intentionally aligned with nearby elements. Stability means it does not wobble, pull away, tip, or shift under normal use. Function means moving parts operate smoothly. Finish means visible surfaces remain clean, protected, and consistent.
| Quality check | What to look for | Why it matters |
|---|---|---|
| Alignment | Level tops, even reveals, straight trim lines, matched panel edges | Small visual errors become obvious in daily use |
| Fastening | No loose screws, stripped heads, missing washers, or exposed sharp points | Secure fastening supports safety and service life |
| Movement | Smooth hinges, slides, doors, locks, and adjustable parts | Binding often signals misalignment or excess tension |
| Surface protection | No chips, scratches, adhesive residue, dents, or stained marks | Finish damage can be harder to repair than structural errors |
| Load readiness | Anchors, brackets, and supports match the intended use | Furniture and mounted items must perform under real conditions |
Keep the manual, spare hardware, warranty information, and adjustment tools after the job is complete. Future tightening, hinge adjustment, relocation, or replacement is easier when the original product information is available.
Frequently asked questions
Is manual installation the same as DIY installation?
Not always. DIY installation means the owner or user performs the work. Manual installation describes the method: hands-on measuring, fitting, alignment, and fastening. A professional installer may still perform a manual installation, especially for furniture, cabinetry, trim, and interior materials that require on-site adjustment.
Should I follow the manual exactly?
Yes, unless the instruction conflicts with local code, site conditions, or a safety requirement. The manual is the primary source for part orientation, fastener placement, load limits, and assembly order. If a step seems wrong or incomplete, pause and verify before changing the method.
Can I replace missing hardware with similar screws or anchors?
Only with caution. Similar-looking hardware may differ in length, diameter, thread type, strength, or head shape. Substitution can damage materials or weaken the installation. When hardware is missing, the safer approach is to identify the exact specification or obtain replacement parts from the product supplier.
What is the most common cause of poor manual installation?
The most common pattern is rushing the preparation stage. Problems often begin with incomplete reading of instructions, inaccurate measurements, unverified substrates, or early tightening before final alignment. Careful layout and staged fastening prevent many visible and structural defects.
When should I stop and call a professional?
Stop when the installation involves heavy overhead work, uncertain wall support, structural changes, electrical or plumbing systems, fire-rated assemblies, or code-sensitive components. Also stop if the product cannot be installed according to its manual. Continuing without reliable information can create safety risks and expensive repairs.